Ad Blocker Detected
Our website is made possible by displaying online advertisements to our visitors. Please consider supporting us by disabling your ad blocker.
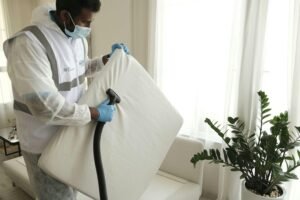
Did you know memory foam tops can take up to 24 hours to fully dry after a wash? You’ll start by checking the care label, then gather a spray bottle, mild detergent, a vacuum, and baking soda. Pretreat stains without soaking, use a foam-safe cleaner, blot from outside in, and avoid saturating the foam. After deodorizing with baking soda for 8 hours, vacuum and air-dry in a well-ventilated spot, keeping tension off the topper as you finish—and you’ll want to keep going.
Key Takeaways
- Identify and follow the care label instructions to avoid voiding warranty and determine if machine washing or spot cleaning is required.
- Prepare the topper by shaking, airing, and using a breathable protector; remove or protect covers as directed.
- Use foam-safe cleaning: vacuum thoroughly, blot stains with a mild detergent foam, and apply a vinegar-based pretreatment without soaking.
- Deodorize and dry: apply baking soda, vacuum residues after at least 8 hours, and air dry fully in a well-ventilated area.
- Maintain long-term: vacuum both sides weekly, rotate monthly, elevate for airflow, and prevent moisture buildup to avoid mold.
Identify the Memory Foam Topper Care Label
Before you begin cleaning, locate and read the care label on your memory foam topper. Start by identifying where the label is—often on seams or tags—and note what it says about washing methods for foam and covers. Check the symbols: machine wash, dry clean, or spot clean, and follow them precisely. The VariaCool Memory Foam layer label may direct gentle cycle washing for the cover, while the True Temp layer may mandate spot cleaning only. Remember, the manufacturer’s instructions take priority to avoid voiding the warranty. If the label allows it, you can machine wash the cover; otherwise, spot clean foam with mild soap. Never soak the foam; avoid hot water, high spin, or harsh chemicals. Air out as advised and plan subsequent cleaning steps accordingly. Regular care matters because proper maintenance helps prolong lifespan and protects against allergens and dust mites while preserving material quality for continued comfort. Identify the care label before cleaning to ensure you follow the correct method and avoid potential damage to your topper.
Gather the Right Tools and Supplies
To start, gather these essential tools and supplies so you can clean efficiently without restarting. Begin with a clean spray bottle: mix 1 cup water and ½ cup delicate fabric detergent, shake well, and spray lightly to dampen stains without soaking foam; reserve an empty bottle for enzyme cleaners. Have absorbent towels and clean rags ready for dabbing and scrubbing in circular motions, plus a dry sponge or washcloth to blot excess solution. Bring a vacuum with upholstery or handheld attachment to lift dust and debris, focusing on seams, edges, tufted areas, and under handles after baking soda sits. Use baking soda on damp areas for 8 hours, then vacuum. Ensure proper drying with an oscillating fan or cool hair dryer and a tarp for protection.
Pretreat Stains Without Soaking the Foam
How can you pretreat stains without soaking the foam? You blot excess moisture first, using a clean towel. Dab fresh liquid stains; don’t rub to prevent spreading. Place the towel in the laundry hamper when done, and focus on edges before moving inward. Repeat blotting until no liquid transfers. Prepare a vinegar-based pretreatment: mix one part white vinegar with one part warm water, or use 3/4 cup warm water, 1/4 cup vinegar, and 1 tablespoon dish soap. Fill a spray bottle for targeted use. Lightly dampen a cloth and blot; don’t soak. Apply solution to stain with a spritz, then dab in a circular motion. Let blood stains sit 10 minutes; urine stains, 20 minutes with enzyme cleaner. Sparknotes: blot, treat, wait, blot again.
| Step | Action | Purpose |
|---|---|---|
| 1 | Blot excess | Prevent spread |
| 2 | Mix solution | Create pretreating agent |
| 3 | Apply lightly | Target stain without soaking |
| 4 | Wait and blot | Lift stain, odor control |
Clean With Foam-Safe, Gentle Methods
Start with a foam-safe, gentle approach to cleaning memory foam. Begin with surface prep: remove the machine-washable cover and wash it separately. Use a regular vacuum with an upholstery attachment or a handheld vacuum, and vacuum the entire surface—sides, seams, crevices—to remove lint, mites, allergens, dust, pet hair, and crumbs. Do this before any liquid cleaning to prevent a muddy mess. For spots, mix a mild detergent with water until foamy; dampen a cloth lightly and work in circular motions from outside the stain toward the center, blotting gently without soaking the foam. For odors, apply a foam-safe vinegar solution (¾ cup water, ¼ cup vinegar) lightly, then blot. Ensure complete air drying before use.
Deodorize and Refresh With Baking Soda
Baking soda acts as a natural deodorizer, so you’ll apply an even layer over the topper and let it sit for at least eight hours to target odors, moisture, and mold risk. For odor neutralization, focus on problem areas and use a light brush or hands to distribute evenly, then vacuum up the residue with an upholstery attachment. To refresh freshness, pair baking soda with sunlight exposure and a ventilated room, and consider a short vinegar touch-up for urine stains if needed.
Baking Soda Application
What’s the simplest way to refresh a memory foam topper? Sprinkle baking soda generously over the entire surface, applying an even, thin layer for optimal coverage. Target problem areas or cover the full topper based on need, distributing liberally without a fixed quantity. Ensure even spreading across the top and down the sides. Let the baking soda sit for at least 8 hours; longer is better, up to overnight for stronger odors. If time is tight, a minimum of 15 minutes can help, but longer improves moisture wicking and deodorizing. After sitting, use a vacuum with a soft brush attachment to remove all baking soda from the surface and sides. Repeat only if residue remains to maintain a clean, odor-free surface.
Odor Neutralization Steps
Ever wondered how to tackle lingering odors on a memory foam topper without harsh methods? You’ll combine practical steps to deodorize and refresh.
- Vinegar first: Mix equal parts white vinegar and cold water in a spray bottle. Lightly mist affected areas, then let complete air drying. Vacuum residues after drying to remove remaining particles. Vinegar dissolves stains and neutralizes odors effectively.
- Ventilation: Open windows and doors, use fans, and rotate the topper to expose all sides to airflow. Maintain circulation for several hours or days to diminish off-gassing smells.
- Optional refresh: If odors persist, apply enzyme cleaner to surface, aerate the room during evaporation, and allow full drying before use. Avoid over-wetting to preserve the foam’s integrity.
Freshness Refresh Process
Are you aiming for a quick, chemical-free refresh? Start by generously sprinkling baking soda over the entire surface of your memory foam topper. Apply liberally to problem areas or cover the full topper for a comprehensive refresh. Use about half a box for average coverage, adjusting by size. Baking soda wicks away moisture naturally without harsh chemicals and is proven effective for odor control on most toppers. Spread evenly with your hand or a brush, ensuring uniform coverage across top and sides to maximize absorption. Focus on areas with residual moisture post-dabbing and allow sodium bicarbonate to penetrate the foam for a deep refresh. Let sit at least 8 hours, then vacuum the entire topper, including sides, to remove residue and dust.
Dry Thoroughly and Verify Complete Dryness
To dry memory foam thoroughly, start by air drying on a flat surface in a well-ventilated area after removing as much moisture as possible. You should avoid heat sources and sun exposure, squeezing out moisture gently, and letting the foam regain shape through natural airflow. To speed and stabilize the process, follow these steps:
1) Place in a breezy indoor spot with fans or open windows to maximize airflow.
2) Turn the topper occasionally to promote even drying and prevent hotspots.
3) Wait one to two days, or until no damp spots remain and expansion is complete.
Verify dryness by checking both sides, then vacuum to remove baking soda residue if used. If odors linger, repeat drying. Complete dryness prevents mildew growth and preserves foam integrity.
Perform Light Post-Cleaning Maintenance
After you’ve dried the topper, implement light post-cleaning maintenance to keep it fresh and ready for use. Start by vacuuming both sides weekly with a soft upholstery brush to remove dust, dirt, and allergens, using a handheld vacuum for precision where debris accumulates. This regular step eliminates residue, dust, and bacteria, preserving a hygienic sleep space. Rotate the topper monthly to ensure even wear, flipping so the head lies where the feet were, and shake it thoroughly to revive its shape as natural materials settle. Periodically air out in a well-ventilated area for 1–2 hours during linen changes to prevent moisture buildup. If you use a protector, ensure it stays clean and breathable, and always follow manufacturer guidelines to avoid damage.
Troubleshoot Common Issues After Cleaning
Identifying issues after cleaning starts with moisture management. If you notice odors, spots, or dampness, tackle moisture first to prevent mold, mildew, and structural damage. Use these steps to troubleshoot common post-cleaning problems:
- Check for lingering moisture and musty smells; ensure thorough drying in a ventilated area, away from direct sun.
- Inspect for stain residues and odors; re-spot with enzymatic cleaner for tough stains, then re-blot and re-vacuum baking soda once completely dry.
- Evaluate drying efficiency; improve airflow by elevating the topper, avoiding stacking bedding, and lowering humidity to shorten dry time.
If issues persist, reassess cleanliness method: avoid hot water, harsh chemicals, and over-wetting to preserve foam integrity.
Frequently Asked Questions
Can I Use a Washing Machine on Memory Foam Toppers?
No, you shouldn’t. Memory foam toppers resist machine washing; it risks damage. Instead, spot-clean, vacuum, and air out. If possible, use a removable, washable cover and follow the care label for best results.
Is Vinegar Safe for All Memory Foam Toppers?
Vinegar isn’t safe for all memory foam toppers. You should patch-test first, then use sparingly; avoid soaking, and air–dry. If uncertain, opt for enzyme cleaners or mild soap for spot-cleaning on most foams.
How Often Should I Vacuum Memory Foam?
You should vacuum memory foam weekly. Use a soft-brush attachment on low suction, sweep evenly across the surface, including edges. For high-traffic or pet-prone homes, increase frequency to twice weekly or seasonal deep cleans.
Can Baking Soda Ruin the Topper’s Memory Foam?
Baking soda won’t ruin memory foam if used correctly, but prolonged contact can cause issues. Think of it like a brief, controlled nudge: apply, wait up to 8 hours, then vacuum thoroughly and air out.
What Signs Indicate Irreversible Foam Damage After Cleaning?
Irreversible damage shows when foam won’t regain shape after cleaning, stays permanently indented, or creaks and tears worsen. You’ll notice persistent lumps, loss of resilience, lingering odors, and ongoing aches despite proper drying and rotation.
Conclusion
If you follow the steps, you’ll restore comfort without risking damage. But as you finish, a stillness settles—the topper’s softness hints at what’s at stake: one spill, one forgotten spot, and the memory foam betrays you by staying damp. So you double-check dryness, you tidy the area, you lock in freshness, and you rotate weekly. The quiet promise remains: a cleaner mattress topper means better sleep, tonight and for countless nights to come.
References
- https://www.dormeousa.com/blogs/sleep-well/how-to-clean-mattress-topper
- https://pandalondon.com/blogs/sweet-dreams-blog/how-to-clean-and-maintain-your-mattress-topper
- https://casper.com/blogs/article/how-to-clean-mattress-topper
- https://www.youtube.com/watch?v=ijck7Ec6EXU
- https://www.bedinabox.com/pages/mattress-cleaning-guide
- https://www.nolahsleep.com/blogs/blog/how-to-clean-memory-foam-quick-guide
- https://putnams.co.uk/blogs/news/how-to-care-for-your-mattress-topper
- https://sleepzonelife.com/blogs/knowledge/the-ultimate-mattress-topper-washing-guide
- https://sleepdoctor.com/pages/reviews/how-to-clean-a-mattress-topper
- https://www.sonivehome.com/blogs/sonive-journal/mattress-topper-101-the-ultimate-mattress-topper-washing-guide